

This guide will definetly help you to create an image-based course and task.
Course example : Word Geography http://www.memrise.com/course/20690/a-world-geography/
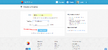
Step 1: From your Home Page, click on "Create".[]

Step 2 : Give your course a simple, descriptive title in the "Name" box.[]
- In this example, it is "UK Road Traffic Signs".

[]
- In this example, it s "Miscellaneous".

[]

Step 5 : Click on the blue "Create Course" button.[]
You should then see a simple, single level that you can populate. But, to see the more detailed features that are available, click on "Add level". This will convert your course to a multi-level one with full functionality and the all-important "Databases" button will become visible.


[]


Step 7: You can now start to populate the levels of your course.[]
In the "Editing" bar, click on "Levels(2)" and against "Level1", click on "Show/Hide".


Step 8: In the blue header for Level 1, click on "New Level" and change the text to a suitable title or leave blank.[]

Step 9: In the empty box under "Add items", type your first word/item and then click on the "+" button to the left.[]
A new line entry will appear below. Continue entering your words/items in this way until you have completed that level (I suggest a maximum of 20 - 25 items for each level).


Step 10: Click on the "Databases" button and select the relevant database from the options shown.[]
Then click on the "Add Column" button. In the dialogue box, give your new image column a short, descriptive name (for example, "picture"). Then, against "Type", select the "images" option and click on "Add".


Step 11: In your new image column, click on "Upload" and select the image you want to use from your hard drive.[]
You may find it easier to first place all the images that you want to use in a folder in your pictures library. When you click on "Upload", you will be taken to your pictures library. Select the relevant image and click on "Open". Your image column should then read "1 image". Repeat for all your entries.


Step 12: Finally, in the white bar marked "Editing", click on "Levels(2)".[]
Then against "Level 1", click on "Show/Hide". Click on the pencil icon against "Test on XXXX, Prompt with YYYY" and a dialogue box will appear. In the drop-down menu for "Test on", select the name of your database,and in the drop-down menu for "Prompt With" choose the name you gave your image column. Click on "Save". Finally, on the next screen, click on the green "Save and Continue" button in the bottom right corner. This will take you back to the course home page.


